I recently upgraded my 3D printer. This was something I wanted to do for quite a while, actually. But first I had to get some financial things sorted (namely, selling a house and paying off a car).
Those things are done, and now so is this. Goodbye, Prusa MK3S+, and hello Prusa MK4.

This kicked off a little frenzy of printing. Before the kit even came in, I started a new project that I knew I’d actually finish after the upgrade.
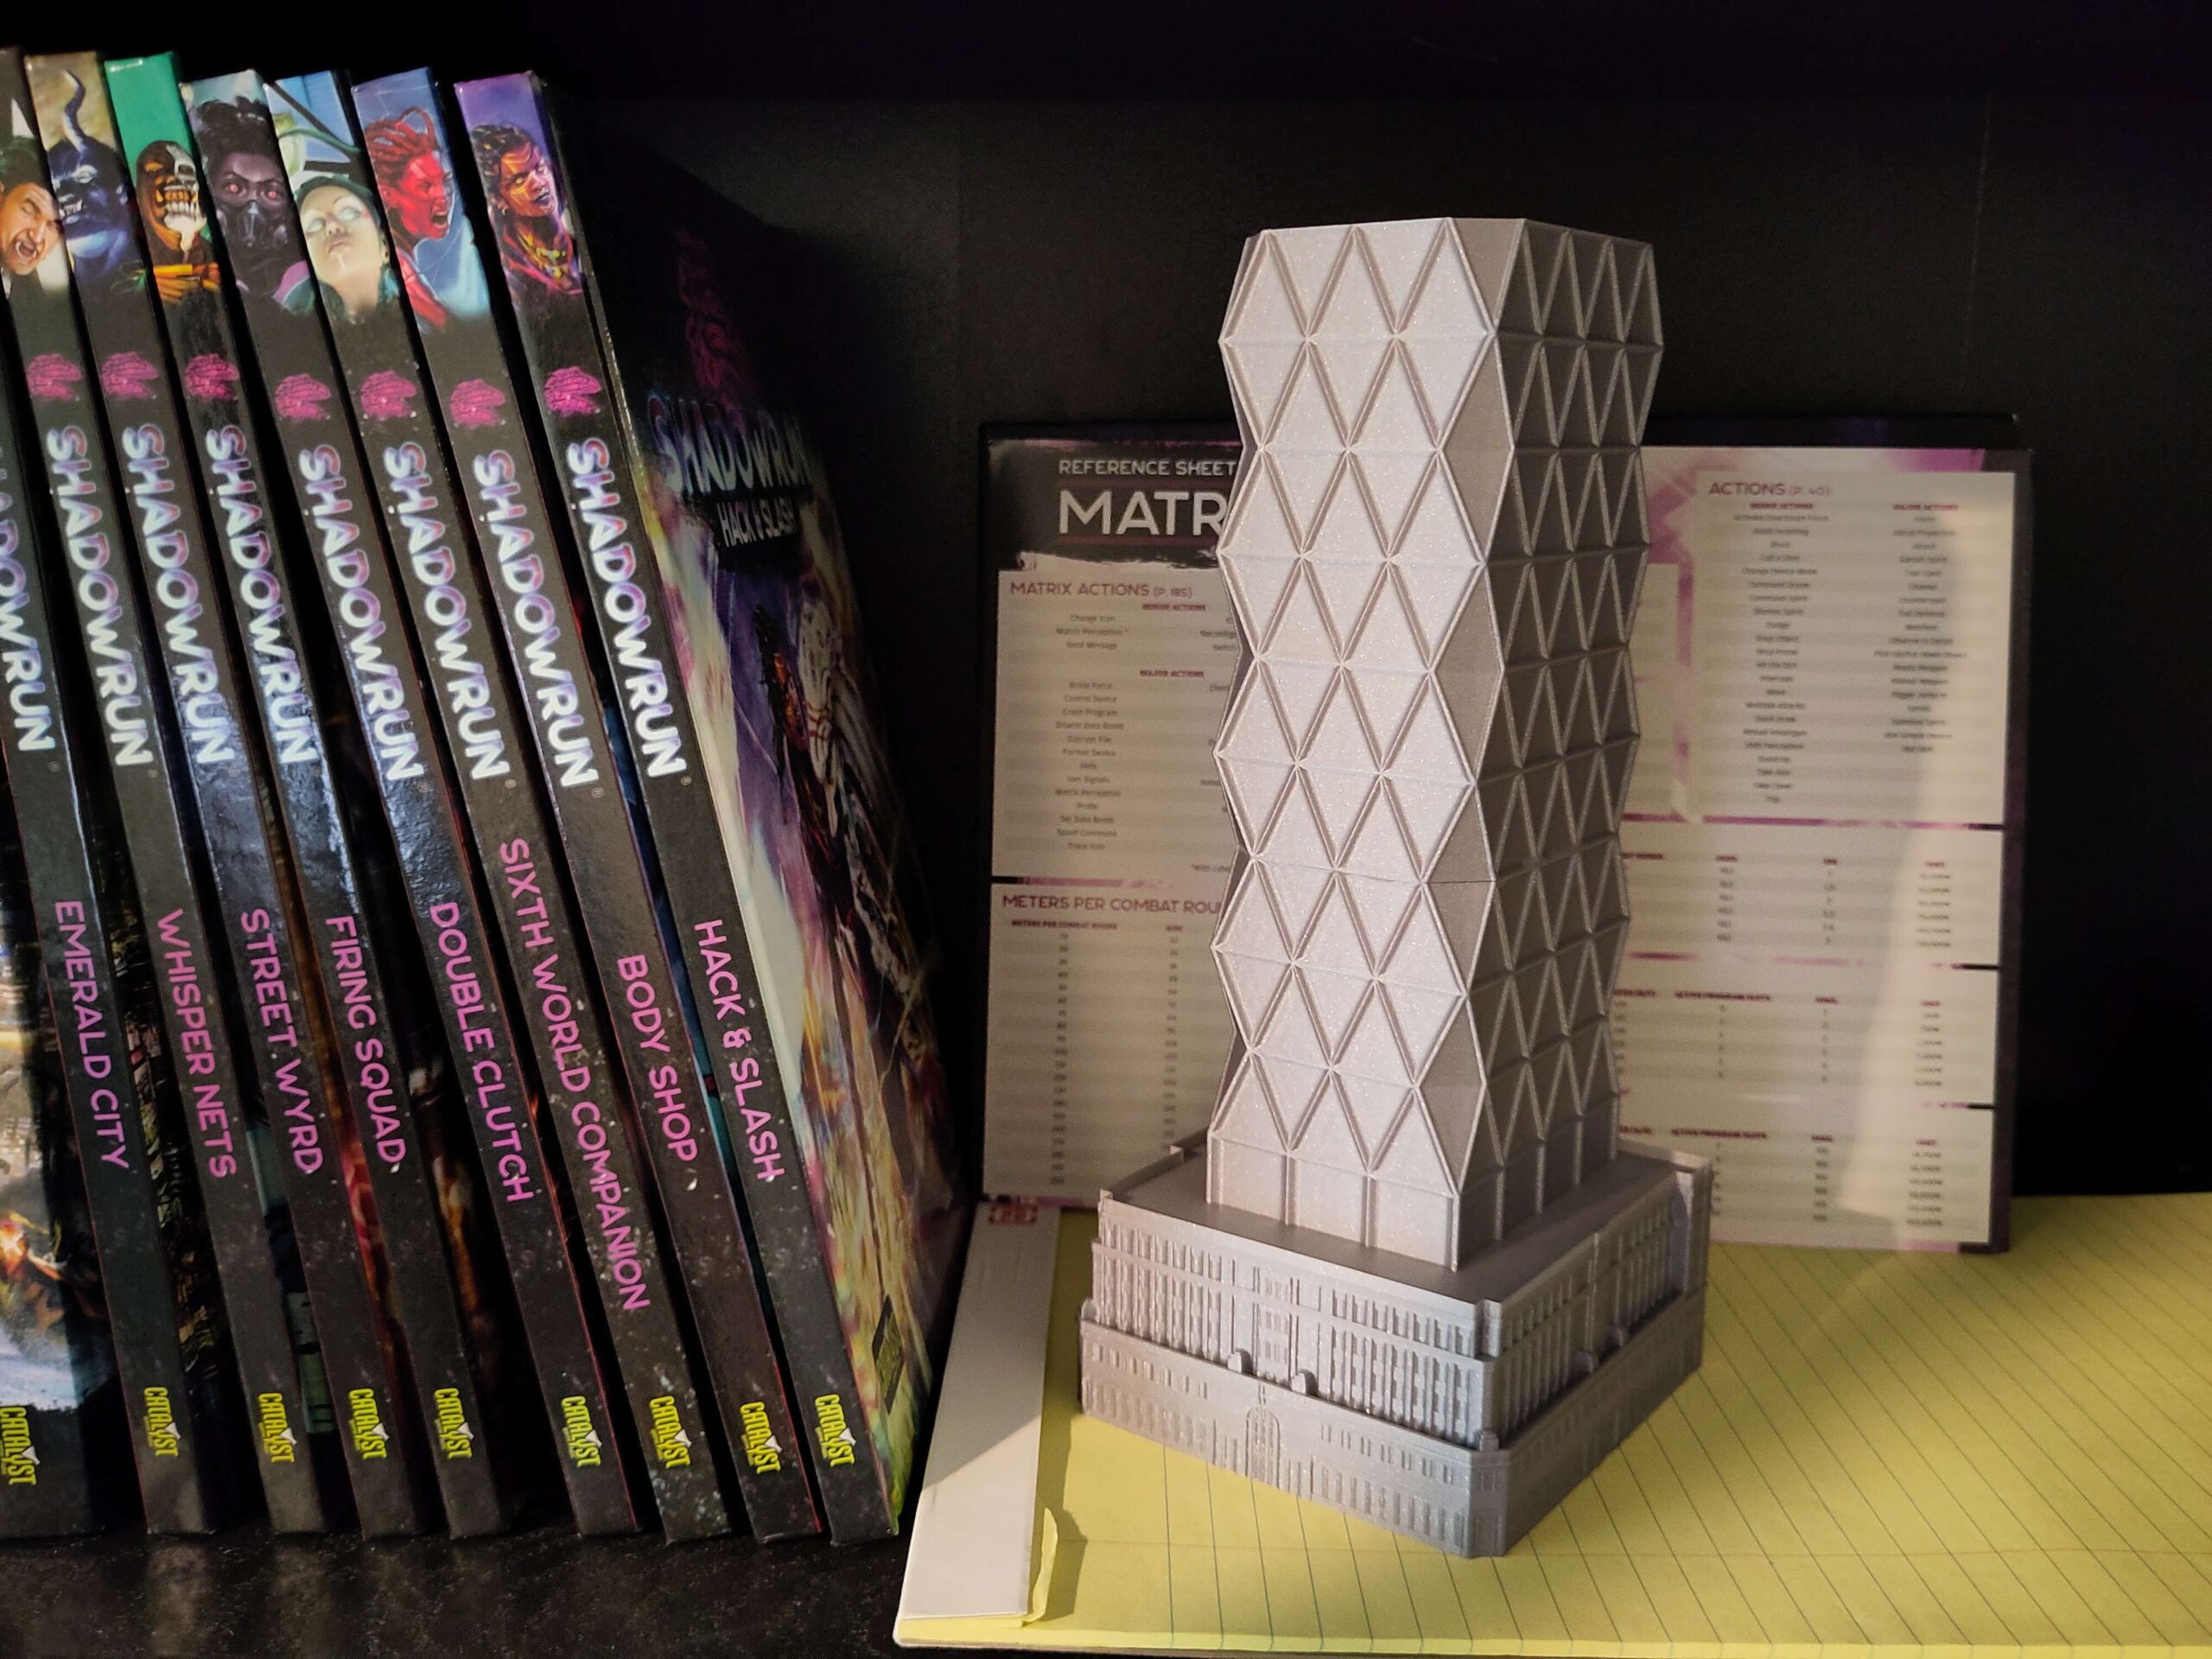
I knew that I wanted a dice tower, but nothing I could find ticked all of my boxes. Most dice towers have fantasy or medieval themes. I presume this has to do with the fact that D&D and its descendants are the most popular tabletop games. I, however, wanted a dice tower that would fit in with my Shadowrun stuff.
The existing dice towers I could find with modern or cyberpunk aesthetics were… not great looking. I’m sure there was something wonderful out there that I just didn’t find, but it’s a bit of a barren field. So instead, I looked for models of my favorite actual towers and went from there.
One of the first buildings I thought of was the Hearst Tower in New York City. And lucky me, I found a good model of it right out the gate!
My next task was to learn how to use Blender well enough to actually make this thing adequately. Over the next several days, I blundered my way through the program. I made a lot of mistakes. I accidentally cut through occluded geometry that I didn’t mean to cut. I painstakingly muddled my way through things that I figured out very fast shortcuts for shortly thereafter.
And in the end, I had a somewhat serviceable model! So I buckled down and started up a nearly eighteen hour print to see how I did.

All in all, not too bad. The original model had columns that I removed. They were far too small to print adequately. So instead, I added small holes to put in something like a piece of filament or a toothpick after. But even those holes didn’t print right, so I made the decision to scrap them and keep the column bases flat.
There was also a thin wall that lost material when it interacted with another detail, so I made the decision to thicken that up. Being more than one wall thick would allow the print head to move more fluidly around details like that.
The biggest change would be the windows on the tower extension, though. The details in there were almost totally lost. They basically just made the windows look fuzzy and the printer took forever trying to add every little windowsill and column in.
About a week later, with the new printer assembled (which was its own saga), I could try out my tweaks. In the intervening time, I’d drastically simplified the model. Every problematic windowsill was gone, the geometry was cleaned up from the wildly subdivided mess that existed before, and I completely revamped the area where the two tower halves connect, such that they would mesh up perfectly (and actually print correctly).

Second time was the charm. It looked so much better. And thanks to the printer upgrade, a cool twelve hours were shaved off the print time for that half alone.
This is my first model that I’ve published for others to use. Before this, I’d only been serviceable with Autodesk Inventor in school. Blender is a whole different animal. I touched Blender briefly before this project, but this was the first thing I actually finished with it. And I dare say that I’m proud of it.
If you’d like to make this for yourself, you can download the files from Printables. Proper attribution and license information is provided in the link.